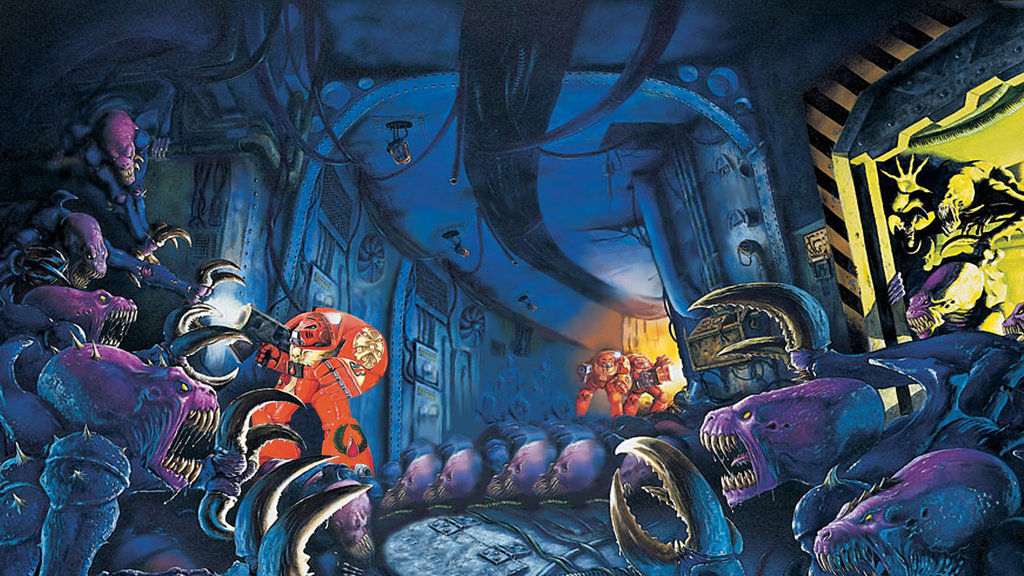
The Tactical Squad

Buying Guide - Orks

Buying Guide - Orks

While the Warhammer 40,000 universe is filled with grim grit and despair it has a distinct streak of humour, both goofy and morbid, running through it. No faction better embodies this humour than the Orks. Orks are hoards of boyz, ramshackle looted trukks, and various other strange sights, all held together solely by belief. In the Warhammer 40,000: Conquest Living Card Game these themes are carried through to create some hilarious and distinct game play. In my first Buying Guide - The Basics, I discussed the LCG format and made suggestions for initial purchases. In this article I’m going to delve into Conquest’s fungal green skinned hooligans, the Orks.

General

warhammer-40000-фэндомы-orks-Blood-Angels-2224020

Orks are a motley crew to be sure. As a faction the green skins can focus on swarms of little runts or bully their opponent with giant nobz and ramshackle trukks. They focus on brutal and indirect damage, and to a lesser degree cost reduction, support manipulation, and readying. New players will enjoy Orks if they enjoy aggressive strategies, playing fast and loose, and don’t mind incuring a bit of collateral damage in the process.

The Threat Beyond (Warlord Cycle)

Orks get a lot of interesting tools in the core set but probably two of their ost important army units come in the Threat Beyond. Snakebite Thug and Evil Sunz Warbiker both provide powerful 2 cost units. They fill out the faction’s cost curve and are versatile options that can be used in any of the Ork warlords. You will also get Mork’s Great Heap which can really boost your deck depending on the strategy you’re using.

The Scourge (Warlord Cycle)

Almost every pack in the Warlord cycle included at least something decent for Orks but one of the best packs was definitely the Scourge. Starting out with Kustom Field Generator Orks get a tremendous support that works as an excellent defensive tool. The faction gains access to Attack Squig Herd and Iron Guard Recruits which are utilitarian units for combat and with Dakka Dakka Dakka! which helps players control swarms of opposing units in addition to being a double shield card.

Zogwort’s Curse (Warlord Cycle)

The last War Pack I would recommend a new player to consider grabbing for Orks in general is Zogwort’s Curse. Not only does this War Pack come with an Ork Warlord that opens up new play style opportunities but it comes with several great Astra Militarum cards you can supplement your decks with. Tallarn Raiders is another cheap but strong unit that can be used for both combat and command. Staging Ground provides a tool for mid combat tricks, being especially powerful with options like Snakebite Thugs and Evil Sunz Warbikers. Finally Steel Legion Chimera is a defensive unit that can be utilized to shield your boyz.

Nazdreg

WHK01-art-nazdreg

Ork’s first Warlord, Nazdreg, is a strong Warlord that focussed on the Brutal mechanic and generally aggressive play styles. Nazdreg is likely one of the warlords that fairs best with only 2 core sets, especially once a few War Packs are added. Generally this warlord favours aggressive cards like Tellyporta Pad and works best with high health units.

Threat Beyond & The Scourge

Like for the faction in general these War Packs are filled with excellent tools for Nezdreg. Snakebite Thug’s self damage turns into extra Brutal fuel, and Kustom Field Generator allows players to spread damage out and more effectively benefit from Nazdreg’s ability.

Boundless Hate (Planetfall Cycle)

The third War Pack I would recommend to a new player unterested in using Nazdreg specifically is Boundless Hate. One of this warlord’s main weaknesses is being targeted directly, something that Front Line ‘Ard Boyz helps protect against. Additionally Rok Bombardment further allows Orks to control large groups of units while allowing Nazdreg’s units to sometimes gain the benefit of extra Brutal power. And finally Sacaellum Shrine Guard is another cheap unit to help fill out your cost curve.

Zogwort

The second warlord given to Orks is the Weirdboy Old Zogwort. A seemingly bizarre warlord at first glance, Zogwort is actually reasonably powerful due to his token creation ability. Because of his self contained ability Zogwort is a good starting point for a wide variety of strategies.

Zogwort’s Curse & The Threat Beyond

For a player interested in the old WeirdboyZogwort’s Curse is an easy sell since it is the War Pack he comes in. Along with Zogwort himself, both Zogwort’s Curse and The Threat Beyond come with all the great cards I’ve talked about this warlord benefitting from.

What Lurks Below (Planetfall Cycle)

The final War Pack I would recommend for a player interested in getting started with Old Zogwort is What Lurks Below. In this War Pack Zogwort can make use of Smasha Gun Battery by applying the damage to produce snotling tokens from Zogwort’s Runtherders or powering up other Ork units. Skrap Nabba is a command body that helps smooth resource gain but also can contribute to combat. Last but not least Orks get the very strong event Outflank’em, which arms Orks with the means to completely warp combat.

Gorzod

Green_Deth

The third warlord for the Orks released during the Planetfall cycle, if Gorzod. This warlord changes the conventional deck construction rules letting you include common Astra Militarum and Space Marine Vehicle army units in your decks. To balance this Gorzod cannot include events, support, attachments, or non-Vehicle army units unless they are neutral or Ork.

Deadly Salvage (Planetfall Cycle)

Like Most other warlord the most important purchase for Gorzod is the War Pack he comes in, Deadly Salvage. Unfortunately this War Pack doesn’t include any Space Marine or Astra Militarum cards that he can include.

The Scourge & The Threat Beyond

Gorzod is no exception among the Ork warlords and benefits greatly from the several staple cards that come in both The Scourge and in The Threat Beyond. Even though Snakebite Thug andEvil Sunz Warbiker are both not Vehicles but still fill vital positions. Among the other cards Kustom Field Generator also helps greatly, allowing you to further potect your already tough units.

Wrath Of The Crusaders - Eldar Spoilers

Wrath Of The Crusaders - Eldar Spoilers

We are now over half-way through the Planetfall Cycle and with most of the factions getting new warlords or interesting cards, it feels like the Eldar have flown under the radar. As we approach the end of the cycle we are starting to see how the Eldar cards in this cycle fit in with their upcoming warlord as well as bringing some interesting updates to the both Eldorath Starbane and Baharroth. The Tactical Squad is happy to share three previously unrevealed Eldar cards from the upcoming War Pack, so let’s jump right in.

Saim-Hann Kinsman

Saim-Hann_Kinsman

The first card is just the Eldar version of Sacaellum Shrine Guard. Whatever has been said about that pretty much goes for this as well. It’s a great command capper unit that can survive and defend itself at a green planets. It just makes the command game in both Eldar and Dark Eldar that much stronger. In Tau it will probably see less play but it still might have interesting interactions with Auxiliary Armor. It is unfortunate that it’s just an almost straight copy of a card from another faction, but since that is a card is considered by most to be quite a good card, one can’t really complain that much.

Eldritch Storm

unnamed

The second card is an event that is also non-loyal. Its effect is like Cacophonic Choir or Dakka Dakka Dakka! in that it deals damage over multiple planets. Unlike those cards, Eldritch Storm only can affect units on planets with the Stronghold (green) icon. However, the damage it does deal at those planets will usually be more significant. It also doesn’t have the negative effect of exhausting your warlord. The card will definitely be harder to use, but when it is used it will most likely be more effective in killing the unit you want dead. The two damage is pretty good in killing off enemy command units, making the already strong Eldar command game even stronger. Like all the other planet type targeting cards, whether their limited use will be worth it will be the big question. There will be games where this card will put you in a position to win or strengthen your position and other games where it will do absolutely nothing.  In terms of use in the other factions it might see play in Dark Eldar, but probably not likely in Tau as they already have decent area effect abilities.

Shuriken Catapult

unnamed (3)

Finally, the last card spoiled is an attachment that is also non-loyal. This card is most likely to be immediately compared to the Ion Rifle. Resource cost wise, it’s the same as playing an Ambush Platform followed by an Ion Rifle. I had first considered this in an Aun’shi deck. Another surprise +3 ATK that doesn’t require an Ambush Platform would be pretty deadly. However, the Warrior limit means it’s only playable on Carnivore Pack and Sting Wing Swarm, both of which don’t see much play. So presently I don’t see this being played in a Tau deck. Compared to the Tau there are definitely more targets for this attachment in Eldar, so that is a plus right off the bat. On closer look the majority of these W__arrior units aren’t presently seen in most Eldar decks, but that might change once the new Warlord comes out. The two exceptions are the Biel-Tan Guardians and Baharroth’s Hawks, both which are great targets for this attachment. Being able to ambush this in can make it a dangerous for any warlord that might try and snipe command from these two units. So overall, its pretty great in Eldar and will probably get better once more of those Warrior units come into play. Where this card might see the most play is in Dark Eldar. Those evil twins of the Eldar have a whooping 16 units with the Warrior trait with a lot of them seeing play in many decks. Specifically, any player who has been using Saliane Morn will definitely want to try and find a space for this card. She can easily afford the 2 resource cost of the attachment and with the ability to ambush her signature squad or Klaivex Warleader the attachment can easily bring them within warlord killing range.

That wraps it up for the Eldar cards from The Wrath Of The Crusaders  War Pack. Overall, the cards won’t fundamentally change how you build an Eldar deck. They do provide some ways to tweak and improve your Eldar decks to maybe cover some weaknesses. Since all these are non-loyal they also will find some play in both allied factions, with Dark Eldar probably getting the better use out of the two factions. The Tactical Squad would like to thanks Fantasy Flight Games for giving us the opportunity to share these with the community. Let us know how you plan to use these new additions in the comment section. Also, tune in to the next episode of the podcast to hear the rest of the squad’s opinions on these cards. On behalf of the rest of the members I thank you for supporting and listening to The Tactical Squad. Until next time, Jon Yeo signing off.

Episode 23 - The Genestealer's Gymkata

Episode 23 - The Genestealer's Gymkata

In this episode of The Tactical Squad Jon, Alex, and Travis bring us a new Reaction Phase, a review of the latest War Pack What Lurks Below, and they teach the secret art of Gymkata. https://tacsquad.provick.ca https://www.patreon.com/tacticalsquad https://twitter.com/tacsquad https://www.facebook.com/tacsquad thetacsquad@gmail.com Tournament Rules Fundamental Event Document FAQ Regional Prizes Canadian Regionals

00:00
00:00
Download file | Play in new window | Duration: 1:21:24

Buying Guide - Astra Militarum

Buying Guide - Astra Militarum

In the Warhammer 40,000 universe the Space Marines represent the poster children of humanity but the true might of the Imperium of Man comes from the Astra Militarum. The countless soldiers of the Militarum are numerous and expendable, a theme that is carried over well into the Warhammer 40,000: Conquest Living Card Game. In my first article, Buying Guide - The Basics, I talked about the LCG format and how to get started in general, today I’m going to focus on getting started with Astra Militarum in particular.

f477df07a26201c8205caf5f812e85d3

General

As a Faction the Astra Militarum rely on the many cheap units they have, bolstered by their excellent supports and powerful multi card combos, to wear down opponents. Many card abilities trigger when guardsmen leave play leading to great potential from the loss of a single unit. While AM aren’t the simplest to play, new players will likely enjoy the faction most if they have experience with other card games, enjoy attrition focussed play styles, or wantto have powerful multi-card combos.

Zogwort’s Curse (Warlord Cycle)

The thirs War Pack of the Warlord cycle, Zogwort’s Curse brings three excellent cards for any AM warlord to use. Steel Legion Chimera exemplifies the faction’s attrition warfare making all of your infantry last that much longer. Tallarn Raiders is one of the staple cheap units giving a great and efficient option for both combat and command. Finally Staging Ground adds an opportunity to deploy units only when needed to surprise your opponent.

Boundless Hate (Planetfall Cycle)

The second War Pack of the Planetfall cycle, comes with three more great options to include in your decks. The first, Sa’caellum Shrine Guard, is another staple cheap unit. Like the Tallarn Raiders this army gives a good combat and command option for minimal cost. Troop Transport is another support that allows for great mid combat utility. Lastly Front Line ‘Ard Boyz is a common Ork card that increases your defensive capability.

The Threat Beyond (Warlord Cycle)

The third War Pack I would suggest to purchase is The Threat Beyond. This War Pack comes with the second Astra Militarum warlord, Torquemada Coteaz. As a play style Coteaz exemplifies the AM combo play style, and leans toward more aggressive strategies. He is a somewhat difficult warlord to use though and I wouldn’t recommend new players bring him to competitive play with getting a good feel for the game and this warlord first. The pack also includes great ally options in the way of Snakebite Thug, Evil Sunz Warbiker, and Firedrake Terminators.

Colonel Straken

The Core Set warlord, Colonel Straken, was one of the least popular warlords released in the box. At this point Straken is still reasonably unplayed but he has a lot of possible combos waiting to be built into a great deck by an enterprising player. Style wise the Colonel focusses on buffing his troops and persistent attrition. Combining him with Space Marines opens up the damage prevention and attrition aspects of his signature squad, while using Orks leads to a much more aggressive builds.

stormtroopers

Boundless Hate & Zogwort’s Curse

Like I discussed previously both Boundless Hate and Zogwort’s Curse provide a number of staple cards for Astra Militarum, this is no exception for Colonel Straken. His buff ability is most efficient when used on large numbers of low cost units and both the Tallarn Raiders and Sa’caellum Shrine Guard are great for this. Additionally the Steel Legion Chimera and Front Line ‘Ard Boyz are great defensive card that increase Straken’s ability to take a beating.

Deadly Salvage (Planetfall Cycle)

The third War Pack of the Planetfall cycle comes with several great options for your Straken deck. Deadly Salvage includes Death Korp Engineers and Vanguard Soldiers, both well costed units with good stat lines and strong abilities. Additionally the pack has Inspirational Fervor which allows aggressive Astra Militarum decks to carry their momentum through the game.

Torquemada Coteaz

The second warlord released for Astra Militarum is the Inquisitor Torquemada Coteaz. He is a far less straight forward warlord than most in the game and I would generally not recommend him to a player who is completely new to competitive card games. That said, in the correct hands he is a force to be reckoned with and an ambitious newbie shouldn’t shy away from him but needs to be ready for a steep learning curve. A player might find Coteaz interesting if they enjoy multi card combos and aggressive play styles.

The Threat Beyond

This War Pack is a bit of an obvious choice if a player is interested in Torquemada. Not only does it come with the warlord and his signature squad, but it also has Snakebite Thug and Evil Sunz Warbiker both cheep and very effective units.

1f002fe9c7e17d5de9a0fc3ec4a44e82

Zogwort’s Curse

Much like for Straken and the faction in general, Zogwort’s Curse is excellent for Coteaz. Tallarn Raiders and Steel Legion Chimera are as good for Coteaz as they are for any other AM warlord, but Staging Ground has extra utility in his decks. Being able to hold units in hand and deploy them as needed in combat assists players in using this warlord to the fullest.

Gift of the Ethereals (Warlord Cycle)

Another excellent War Pack for Astra Militarum in general Gift of the Ethereals has several great tools to use with Coteaz. Mystic Warden a unit that has limited use in most decks is excellent for our inquisitor as a cheap target to sacrifice. The other notable AM card, To Arms!, is an excellent option for both the two shield icons and the powerful combo potential with cards like Catachan Outpost. The War Pack also comes with Ammo Depot, White Scars Bikers, and Crushing Blow, all great cards depending on your ally and battle plan.

Broderick Worr

The newest Militarum warlord, and quite possible the most competitive so far, Broderick Worr excels at decks using mostly or only Astra Militarum units. Worr is a very flexible about what AM units he uses and his play style in general, and as a result is probably the best AM warlord for a new player to use. Worr excels at buffing his own units, applying consistent pressure, and unit efficiency.

Decree of Ruin (Planetfall Cycle)

This War Pack is a must as it includes Broderick Worr himself along with his signature squad. Unfortunately because this warlord uses mainly AM units there really aren’t any additional cards worth using.

Boundless Hate & Zogwort’s Curse

I’ve covered both of these War Packs already and most of what I’ve said hold true for Worr also.

War Journal - Yelling into the Void

War Journal - Yelling into the Void

Rotation 7 - Feb 6th to Mar 17th In the grim future there are only burly men yelling.  Or at least that’s all there was in this rotation. This time around I focused on Ba’ar Zul, the Hate-bound, bringing him to two Store Championships, and also worked on my Colonel Straken damage prevention deck. I had these decks built for almost seven weeks, but, with moving taking up most of my life during that time, I didn’t get to play much. That said, I did get some great testing in and really enjoyed playing Ba’ar Zul. Speaking of our angry friend, let’s dig in.

Ba’ar Zul

[table width=“250px”] Army (29)[attr colspan=“2”] 4xBa’ar Zul’s Cleavers 3xChaos Fanatics 3xGleeful Plague Beast 3xHeretek Inventor 3xKhorne Berzerker 3xRavening Psychopath 3xRavenous Flesh Hounds 2xRogue Trader 3xSplintered Path Acolyte 2xVoid Pirate [/table]

[table width=“250px”] Attachment (6)[attr colspan=“2”] 2xPromotion 3xSlaanesh’s Temptation 1xThe Butcher’s Nails[/table] [table width=“250px”] Support (1)[attr colspan=“2”] 1xKaerux Erameas[/table] [table width=“250px”] Event (14)[attr colspan=“2”] 3xArchon’s Terror 2xBlood For the Blood God! 2xExstatic Seizures 2xPromise of Glory 2xSowing Chaos 3xTzeentch’s Firestorm[/table]

This is the deck list I used during both Store Championships. I also experimented with some changes since. I will mention those closer to the end.

When he was first spoiled some time last fall my interest in Ba’ar Zul was pretty minimal. Playing him now I found that really enjoyed the play style he affords. During this rotation I brought him to two store championships, going 3-1 and 2-2 in a 14 player event. Considering these were collectively the first eight games I had played with the warlord I was quite pleased. Starting out building the deck I wasn’t sure if there was a gimmick worth exploring so I just began assembling what I considered to be generally good Chaos cards. As I began putting things together I was curious what the collection of Khorne trait army units had to offer. Khorne Berzerker is a generally good card for inclusion in any Chaos deck, as is a copy or two of Roghrax Bloodhand. Ravening Psychopath helps stack damage onto Ba’ar Zul and guarantee he becomes bloodied on your terms. I decided that the deck also made sense with enough cultists to include Ravenous Flesh Hounds, a unit that hasn’t seen much play since the Core Set but has so much survivability in this deck it is quite valuable. Making my way through all these decisions I realized that I had almost completely filled out my deck and I still hadn’t picked an ally faction. Since I felt I had no specific needs from at this point I decided to ally with Dark Eldar solely for the use of Archon’s Terror. When I finally got around to playing the deck my general strategy was to try to win my second win condition planet using Ba’ar Zul as a damage soak. This would lead him to being bloodied and ready to tank his way through my winning planet. In most games this plan worked quite well. Ba’ar Zul would become bloodied on turn two or three and the game would be over by turn four or five. If it continued too long Ba’ar Zul would lose the ability to put pressure on. In games where my opponent didn’t offer enough opposition to bloody Ba’ar Zul I would use my own units to do so, triggering Ba’ar Zul’s Cleavers or letting Gleeful Plague Beast deal damage unshielded. That said, playing our Hate-bound warlord is something of a tightrope walk. You have to be very conscious of when you let him go and how to use him through the entire game. Games required a somewhat reckless mentality otherwise I feel the pressure would have been too much compared to other warlords. I’m not sure I would really recommend using Ba’ar Zul at any high level events unless a player is very comfortable with him of focused on fun over competitiveness. Since those tournaments I’ve added in Sslyth Mercenary, Seer of Deceit, and Gut and Pillage to help smooth out my economy.  I haven’t had enough games to really determine the effectiveness of these additions yet. What testing I have done is pretty promising, between Promise of Glory and Gut and Pillage I managed to get almost 40 resources in 4 rounds one game.

Straken

[table width=“250px”] Army (29)[attr colspan=“2”] 3x10th Company Scout 3xBlood Angels Veterans 2xDaring Assault Squad 2xFiredrake Terminators 2xIron Guard Recruits 3xRighteous Initiate 3xSa’caellum Shrine Guard 2xSteel Legion Chimera 4xStraken’s Command Squad 3xTallarn Raiders 2xWhite Scars Bikers [/table]

[table width=“250px”] Attachment (5)[attr colspan=“2”] 2xBodyguard 2xPromotion 1xStraken’s Cunning[/table] [table width=“250px”] Event (12)[attr colspan=“2”] 3xCrushing Blow 2xGlorious Intervention 3xIndomitable 2xSuppressive Fire 2xThe Emperor’s Warrant[/table] [table width=“250px”] Support (4)[attr colspan=“2”] 1xOmega Zero Command 3xRockcrete Bunker[/table]

This deck is just a continuing development of the Colonel Straken deck I talked about in my previous War Journal - It Just Won’t Die. I only ended up playing a few games since not much has changed at this point. I added in Sa’caellum Shrine Guard to help smooth out the lower end of the cost curve. Otherwise most of the changes I made were minor number changes of units that I had already included. The deck is very strapped for space but at some point I would like to find space for Troop Transport and Inspirational Fervor. As the meta shifts this deck still seems a reasonably effective style to use for Straken. Certainly it is the most effective I’ve come across. It is still lacking the over all control to actually become top tier, but we may see the tools it needs still yet.

Conclusion

Moving into the next rotation I will be catching up with the Planetfall warlords I haven’t had a chance to play with yet. Gorzod, Subject Ω-X62113, and Archon Salaine Morn will likely be the focus of my attention until at least Wrath of Crusaders releases in mid to late April, if not beyond that. Until then, Loot all da trukks and make’m go fastaaaaaa!!!! WAAAAAAAAGGGGH!!!!

[table width=“208px”] Ba’ar Zul[attr colspan=“2”] Win v Shadowsun (Planet 5) Loss v Selain (Kill 5) Win v Aun’shi (Planet 3) Loss v Ragnar (Planet 5) Win v Aun’shi (Planet 4) Loss v Zarathur (Planet 5) Win v Nazdreg (Planet 5) Win v Swarmlord (Planet 4) Win v Swarmlord (Planet 4) Loss v Worr (Kill 5) [/table]

[table width=“208px”] Straken[attr colspan=“2”] Loss v Old One Eye (Planet 6) Win v Ba’ar Zul (Planet 7) Win v Subject Omega (Planet 6) [/table]

Buying Guide - Space Marines

Buying Guide - Space Marines

Space Marines are more or less the poster children of the Warhammer 40,000 universe and that has held true with the Warhammer 40,000 Conquest Living Card Game. In my first article, Buying Guide - The Basics, I talked about the LCG format and how to get started in general, today I’m going to focus on getting started with Space Marines in particular.

General

Space Marines are possibly the easiest faction to pick up and play as a new player. They have sturdy units, good damage prevention, solid combat tricks, and great options available in their ally factions. New players will find Space Marines exciting if they enjoy long lasting units, the ability to deploy units on the fly, and minor control abilities.

Core Sets

In general Space Marines have an exceptional selection of cards right out of the game’s first box. I think the best recommendation to make if Marines are your faction of choice is to start out with a full set of 3 core sets. This will give you a really wide breadth of the factions best options.

Howl of Blackmane (Warlord Cycle)

The core set provides so many excellent options the jumping right into the next warlord is actually very easy to do. This War Pack will give you the signature squad for Ragnar Blackmane and let you experiment with a new play style.

ultramarine_captain_cato_sicarius_by_diegogisbertllorens-d7cml6y

Cato

Captain Cato Sicarius is the faction’s core set warlord. Style wise Cato is generally quite good at almost any strategy you want to take. His ability means you can afford to play a slightly more expensive deck than most other warlords. His signature squad has a variety of powerful control effects that apply to a number of circumstances. All told he makes an excellent starting point.

Core Sets

Since Cato is great at playing a variety of styles the core set really helps you fill out those options. I would say that owning 3 core set boxes is a top priority for this warlord.

Gift of the Ethereals (Walord Cycle)

If you aren’t quite ready to go all in with 3 core sets or if you already have and you’re ready to expand further my next suggestion would be Gift of the Ethereals. This War Pack brings with it one of the most powerful Space Marine events, Crushing Blow. You also get White Scars Bikers, an excellent 3 cost unit expanding out the variety of options to use with Drop Pod Assault in the core set. There are also a few other cards to expand your deck building options

Descendants of Isha (Warlord Cycle)

The last War Pack of the Warlord Cycle, Decendants of Isha fills a lot of holes that were remaining in each of the factions. For Space Marines this includes Space Wolves Predator and Primal Howl. Cato himself provides a reasonable number of resources over the course of a game and since most warlords will have no qualms taking Cato face on you can use often use Primal Howl to fill in your card draw. Space Wolves Predator on the other hand is a great big toy that lets you bully opponents. These of course aren’t the only new options you’ll get, the pack comes with more options both in faction and from allies.

Ragnar

Space Marines second warlord, Ragnar Blackmane, was released in the first War Pack of the Warlord cycle. His style is much more aggresive than Cato’s, allowing Ragnar to bully and sometimes even assassinate opposing warlords. Even with this he can work quite well with very similar decks to Cato, as well as radically different focusses.

Howl of Blackmane (Warlord Cycle)

This War Pack is a bit of a no brainer if a player is interested in playing Ragnar as it is the product he comes in. Fortunately if you already have a couple core sets this is all you will need to get started with our Fenrisian Space Marine.

_**

d68e3a0840d5f90e89c6dd1d7bfdc395

Gift of the Ethereals (Warlord Cycle)**_

This War Pack provides much of the same benefit to Ragnar as it does for Cato. Ragnar though is likely to make much greater use of both White Scars Biker and Crushing Blow. Because Blackmane is able to bully and threaten a warlord kill, both cards become much more versatile.

Zogwort’s Curse (Warlord Cycle)

In my oppinion the most effective ally to Ragnar is the Astra Militarum, and one of the best packs for AM is Zogwort’s Curse. For Blackmane the Tallarn Raiders provide an excellent 1 cost army that adds to your command prescense and your combat pressure. Staging Ground also comes in the War Pack and add to the surprise and flexibility of the deck. Finally the War Pack comes with several other cards that, while not the most competitive cards, will add variety to your deck building options.

War Journal - The Other Star...guy?

Rotation 6 - January 7th to January 28th

Its that time again! only about a month late its time for another War Journal. This time around I will be looking at my play experience with and thoughts about Commander Starblaze. I also played some games with Zarathur, and have moved on from Old One Eye. I’m not sure how much I have that is worth while so they won’t be included today. With that out of the way let’s dig into the 41st millenium’s anime space fish.

Starblaze

[table width=“250px”] Army (32)[attr colspan=“2”] 4xArdent Auxiliaries 2xAssault Valkyrie 3xBork’an Recruits 3xExperimental Devilfish 2xFireblade Kais’Vre 2xIron Guard Recruits 3xRatling Deadeye 3xRecon Drone 2xSanctioned Psyker 2xStalwart Ogryn 3xTallarn Raiders 3xVior’la Marksman [/table]

[table width=“250px”] Support (5)[attr colspan=“2”] 2xCatachan Outpost 2xStaging Ground 1xStarblaze’s Outpost [/table] [table width=“250px”] Attachment (4)[attr colspan=“2”] 3xIon Rifle 1xSearing Burst Cannon [/table] [table width=“250px”] Event (9)[attr colspan=“2”] 2xBond of Brotherhood 2xDeception 3xSuppressive Fire 2xTense Negotiations [/table]

Life has been busy and I didn’t get as many games as I would like in and its taken me a lot longer than planned to write this. Starblaze was interesting but really didn’t capture me as much as other warlords have. I tried to construct a deck that focussed on unit efficiency as I believed that is the inherent strength in his signature squad. Using Ardent Auxiliaries and Experimental Devilfish you can build a persistent first planet bully. Add in the effect of Starblaze and you can move around your powerful Astra Militarum army units. The command presence this deck provides is also very hard to compete with. Again Starblaze’s ability and the constantly ready units provide efficiency in the command phase. AM and Tau also have quite likely the largest combined selection of two command icon units. While the basics look good on paper the reality seems to be less exciting. Neither AM or Tau have the trick available to most other factions to carry them through combat. It also seems that at least this version of the deck just doesn’t have the punch needed to win big fights. I think that maybe a heavier focus on attachments or the use of harder hitting AM units might be a direction to go as far as experimentation is concerned. I’m not sure we’ve gotten any real wow card to update it with though. I’ll probably leave Starblaze alone for the next while. Moving forward I’ve already begun to play with Ba’ar Zul, the Hate-bound and I’m revisiting Colonel Straken. I haven’t managed to get many games in in February so I will be continuing with these decks for at least a few more weeks. Until then, SKULLS FOR THE THRONE OF KHORN!!!

Episode 22 - Gozrod... Wait Gorzod?

Episode 22 - Gozrod... Wait Gorzod?

In this episode Jon, Travis, and Liz dig deep into the scrap heap and review the cards released in the Deadly Salvage War Pack.  https://tacsquad.provick.ca https://www.patreon.com/tacticalsquad https://twitter.com/tacsquad https://www.facebook.com/tacsquad thetacsquad@gmail.com Deathworld cycle announcement https://www.fantasyflightgames.com/en/news/2016/3/1/jungles-of-nectavus/ Summer prize kit https://www.fantasyflightgames.com/en/news/2016/3/4/order-your-summer-2016-tournament-kits-6/ US Regionals locations https://www.fantasyflightgames.com/en/2016-regional-championship-locations/ UK Regionals locations http://www.esdeviumgames.com/news-item/fantasy-flight-games-regionals-stores-announced/

00:00
00:00
Download file | Play in new window | Duration: 1:31:18

The Hammer Dance

If there is one thing about Warhammer 40,000: Conquest that new players miss, it is the importance of the Command Struggle.  Sure, you can try to dump all your units at planet 1 each turn and hope to win by brute force, but after a turn or so you’ll look across the table and say “Hey, why do I only have 4 resources and 2 cards while my opponent has 10 resources and 7 cards?”.  The reason?  The Command Struggle. The Command Struggle is the most subtle part of Conquest, but if you ask me, it is easily the most important part of it.  Even if the first three planets share an icon and your opponent won the first two, with more resources and cards at your disposal you can pick and choose your battles and overwhelm your opponent where necessary.  The Command Struggle requires many small choices to maximize your returns and minimize your losses.  So the question is, how do you maximize your gains from the Command Struggle, while not letting your opponent win the game by planet icons?  As you all know, whichever player has more command icons on their units at a planet after Warlords have committed will receive the card and resource bonus from a planet.  Leaving Warlords out of it for now, let’s discuss the basics.

Units

What is a command unit?  I would classify a unit as a command unit if it costs between one and two resources and has at least as many command icons as its cost.  Units like the one cost two command icon Biel-Tan Guardians and the two cost two command icon Iron Guard Recruits are good examples of command units.  What is a combat unit? A combat unit is a unit that costs three or more which has some decent attack and hit point stats or abilities intended for combat.  In general, you do not want to play out a combat unit for command.  Why pay three for the same number of command icons you can get for one resource, right?  There are situations where it is useful to play a combat unit out for command, which we will discuss later. What is a versatile unit?  There are other units such as the one cost one command Tallarn Raiders or Vior’la Marksman which can help out in a battle, but also are cheap and can be played at a planet to win command.  Still more examples would be more expensive units that have a way to move into combat during the combat phase, such as mobile units, Wildrider Squadron, or Boss Zugnog.  Having some of these more versatile units can help you strike the balance between command and combat.

Tips and Strategies for Command

Spread out your command icons. While it is tempting to deploy a Leman Russ Battle Tank with its whopping four command icons to planet five to lock down command there for most of the game, it is terribly inefficient to play a five cost unit for command that is meant for battle.  You could spend those five resources on three to five different units and spread your icons across the planets, making it much more likely to win multiple command struggles. Stall as much as you can before deploying units.  The longer you can wait until you start deploying your units, the less information your opponent has when they have to deploy theirs.  If you can play out some supports or take other actions that use up your deploy turns first, you are both gathering more information for yourself and denying it to your opponent.  Save two command icon units for later in the deploy phase. This point is related to the point above.  While it is tempting to play out your Void Pirate in your first deploy turn, your opponent could then play a two-command icon unit out at that same planet, surpassing your command at that planet.  If you can wait until your opponent has played a one command icon unit out to a planet, you can then play out your two command icon unit to surpass it.  Play units that have resource or card bonuses out to less desirable planets.  As a general rule, I like to play my Void Pirate and Rogue Trader out to Iridial and Y’varn, the planets that have a single resource or card bonus.  Your opponent will be less likely to fight you for command at these planets because in doing so he will get a smaller bonus than he would at a planet with some combination of two command rewards.  Try to win command on planets that reward you with what you are missing.  If you have a lot of resources and not many cards, then focus your command units on planets that give card bonuses, and vice versa. Take a look at the big picture of the planet layout.  If you look at the planets you may notice a balance between cards and resources.  At times you will look at notice that there is a very large surplus of one type, it can be as extreme as seven resources and only two cards.  If this is the case, then evaluate your current holdings of cards and resources and decide whether you should focus on these rarer rewards. If possible, try to choke your opponent.  While there are times where you may be frustrated and want to take me literally, I am not condoning violence against your opponent!  Choking your opponent involves winning command in such a way that you stop them from gaining something they are short on already.  If your opponent has one card and eleven resources, try to win planets that have card bonuses.  If you cannot do that, then tie command on those planets.  As long as your opponent is not getting the cards or resources that they need, the choke is effective.

Cards to be Careful of

There are a few cards that can really put a wrench in your command game so I wanted to list them below so you know what to watch for. [whc]Archon’s Palace[/whc]  This card can only be played by a Dark Eldar opponent.  It allows your opponent to turn off the card or resource bonus of a planet that you win command on.  If you are playing against Dark Eldar, I would focus on the planets that give one card and one resource first before the planets with two of a single reward.  When you win command on a one and one planet your opponent can only shut down half of your reward.  Also, avoid playing a Rogue Trader to a planet which rewards two resources, as they can shut down all three.  Try to play your Void Pirates and Rogue Traders so they are at planets which give them the opposite reward that they provide. [whc]Sowing Chaos[/whc]  This card can be played by Chaos, Dark Eldar or Orks.  This card destroys all units that cost two or less at blue planets.  Sowing Chaos is a game changer if you are not careful.  If you see your opponent is playing Chaos or allied with Chaos, be careful of sending your command units to blue planets.  If there are non-blue planets in play, focus command on them.  If you notice that your opponent has lots of units that are vulnerable to Sowing Chaos in play, it is less likely that they will play it because it would hurt their board state as well. [whc]Rotten Plaguebearers[/whc]  This card can be played by Chaos, Dark Eldar or Orks, notice a pattern here?  It is a two cost unit with a command icon that has an ability which allows it to exhaust to do one damage to a unit at the same planet.  If you put out a command unit with low hps opposite this guy, your opponent can use his action to try to kill your unit, causing you to use shields to keep it alive. [whc]Atrox Prime[/whc]  This is a planet whose battle ability deals one damage to all enemy units at an adjacent planet.  If the command unit you want to play has only one hp, be mindful when deploying it at a planet adjacent to Atrox Prime.  If your opponent triggers a battle at Atrox Prime, or a battle at Carnath and triggers Atrox Prime’s ability, you can lose your unit.

Warlord Commitment

Your warlord has a super saiyan giant hammer that trumps the command of all enemy units at the planet he or she is committed to, save for the enemy warlord.  Committing your warlord to a planet requires many considerations, but I would like to touch on a few command-specific decisions.  Don’t send your warlord to a planet that you’re winning command on.  Let us say that you’re winning command on two planets and your opponent is winning on the other three.  In general, sending your warlord to one of the planets you are already winning on is a suboptimal play.  You were already going to get the command rewards from that planet.  Sending him to a planet that your opponent is winning command on not only denies your opponent those rewards, but also grants them to you.  There are exceptions to this general rule of course, such as if you are trying to choke your opponent, or know that they want to exercise the battle ability of that planet, in which case you may choose to send your warlord to that planet to block your opponent. If you plan to send your warlord to a planet, don’t bother deploying enough units there to win command.  If you see a planet whose battle ability you want to win or where you want to drop off all the units in your HQ, you are likely going to send your Warlord there.  If your opponent has a Void Pirate sitting at it, rather than deploying a two command unit out to win command there, put that unit somewhere else.  Your warlord is going to trump the Void Pirate anyways, so those resources are better spent elsewhere. Don’t always follow the two above rules.  This may sound strange, but you see these two rules above?  Don’t follow them 100% of the time.  If you do your commitments will be more predictable and your opponent will be able to decide where you are most likely to go and potentially stop you there.  They are both ways to ensure that you get more out of your command struggle, no doubt, but sometimes you need to make suboptimal commitments just to keep your opponent guessing. Thanks for reading, I’ll see you in the next article! John “Wigg” Gobeil John “Wigg” Gobeil is a veteran Conquest LCG player based out of Toronto, Canada. He contributes to the community as a tournament organizer for events in his area, a moderator for the Conquest LCG Facebook community, and a regular guest on a number of podcasts and other Conquest LCG media. Notably he is considered to be the scourge of many Toronto players who curse his regular high tournament placings and soul crushing. The Tactical Squad curses you John.

Face to Face Store Champs Winning Deck Report

Face to Face Store Champs Winning Deck Report

This deck took first place at the Face To Face Games Store Champs. Shout-out to Graham from Face to Face Games for running an awesome event that featured five different Fantasy Flight Store Championships which ran at the same time!

Gorzod’s First Dance

Army (30) 3x Assault Valkyrie 1x Crushface 2x Front line ‘Ard Boyz 4x Gorzod’s Wagons 1x Land Raider 2x Mordian Hellhound 2x Rickety Warbuggy 3x Rogue Trader 3x Shoota Mob 3x Snakebite Thug 3x Steel Legion Chimera 3x Void Pirate Attachment (4) 3x Promotion 1x The Bloodrunna Event (12) 2x Battle Cry 3x Dakka Dakka Dakka! 2x Hostile Acquisition 2x Rok Bombardment 3x Squiggify Support (4) 1x Kustom Field Generator 1x Kustomisation Station 1x Mork’s Great Heap 1x Tellyporta Pad I was extremely surprised that I won the event. I threw this deck together the night before the tournament, and bought the new War Pack at the event. I kind of expected to lose badly. Turns out Orks have some pretty annoying units! We had 8 players and ran 3 swiss rounds. The first round was against Kevin’s Eldorath Starbane deck. The first five planets were all green (Strongpoint). I won initiative. I believe my first drop was a Land Raider to planet one and a command unit to a later planet. I believe he dropped a Starbane’s Council to Osus IV (planet 3) and a Biel-tan Guardians to where my command unit was. I committed to the planet 3 with the Council. I won the first planet. I committed my warlord to a planet with his Starbane’s Council, holding 3 double shield cards in hand and 3 resources to his 2. I knew this was a huge risk because I was potentially looking at 10 damage from his council. I swing for two and Kevin doesn’t shield. I decide to NOT to Squiggify his council: I didn’t want him to just retreat. He swings for 5 with the council and I shield 2. We ready and I swing for 2, he shields for 2. I decide at this point, it’s time to Squiggify. He swings for 1 so I’m at 4 damage. We ready and I swing again which kills the Council. Kevin plays Gift of Isha and swings for 5. I have no answer for this so I’m Bloodied. At this point I’m thinking… maybe I’ve made a mistake, BUT I have major board presence as he only has his warlord and a command unit on the board while I have a Land Raider in HQ. I play a Front Line ‘Ard Boyz, I believe at this point at planet 1. The middle part is kinda muddy, but on either turn 2 or 3 he ends up DOUBLE Archon’s Terror my Land Raider and ‘Ard Boyz so he can win a planet. We split the rest of the planets until the game winner on the original planet 5. At this point I have 2 ‘Ard Boyz, a Land Raider, Mork’s Great Heap and a Kustom Field Generator in play along with a couple smaller units. This made my army very very hard to deal with and it allows my bloodied Gorzod to still swing for 2 without fear of getting assassinated. I win after an early bloodied warlord scare. Tactically, I think was probably a mistake, but in the long run it may have helped me win the game. The second round was against Fernando’s Broderick Worr deck. Another 5 Strongpoint (green) planets drop (which is terrifying when playing against Worr). He wins initiative and keeps while I mulligan. I decide that I probably should try to bully a way into victory, so I drop an Assault Valkyrie and Land Raider to planet 1 and pass. He drops a Troop Transport, an Inquisitorial Fortress (uses it on the Land Raider in the deploy phase) and a couple command units/soldiers (I believe an Enginseer Augur to planet 1, Tallarn Raiders to Tarrus (planet 2), and I think Iron Guard Recruits or something to Barlus (planet 3)). I commit to Barlus (3) and he commits to Tarrus (2). I win planet 1 by killing the Enginseer (and gets a Catachan Outpost from its death) and then using 3 double shield cards to take 3 damage total on the Valkyrie. I believe we have the same # of units (3) so Tarrus doesn’t trigger. I win planet 3 and trigger Barlus’s battle ability and discard a Troop Transport out of Fernando’s hand. This was a HUGE pull for me. After that I believe I drop down a Gorzod’s Wagons to planet 2 or 3 and a Tellyporta Pad. The pad let’s me bring over the Wagons to planet 1 to win it. I think it all leads to a big battle for the win at planet 1, where I’ve deployed a Shoota Mob and Snakebite Thug and a Rickety Warbuggy. I also deploy a Kustom Field Generator. I believe coming from HQ was a Land Raider, Gorzod’s Wagons and something else. I don’t think that unit list is entirely correct but he couldn’t recover from the first turn when he lost too much (he didn’t expect so many shields, and he didn’t hit a troop transport with the Enginseer). The third round was against Kyle’s Torquemada Coteaz deck. The earliest possible game victory is at planet 5. In this game we have a fairly even command struggle battle in the first round, but I manage to kill a bunch of his units and choke him out for command while I have a Steel Legion Chimera, Front Line ‘Ard Boyz, Mork’s Great Heap, The Bloodrunna on Gorzod (10 HP with the Heap!), Land Raider and Kustom Field Generator out. This sets up a bad chain of first planet victories for me, with the final battle also including some Rickety Warbuggys, a Snakebite Thug and Crushface. I had a pretty solid draw while my opponent just didn’t draw what he needed. I feel like this happened a lot today, so luck was in my favour! Kyle was also only playing with 2 cores, so kudos on him for doing so well with only 2, and perhaps that helped me get the W! So, final thoughts about the deck: I really like it! I mean, on paper I fully expected to not win a game. I didn’t think the deck had enough tricks to survive long drawn out battles or warlord tricks. While I didn’t play any traditionally tricky decks (Cato, Kith and Zarathur), I found it to be an extremely durable deck. Let me first say that KFG is a BEAST. It’s always been that way in Nazdreg, but with Front Line ‘Ard Boyz, it truly makes decks without AE attacks groan. If you can’t rout the ‘Ard Boyz, you’re looking at 5 HP + whatever I choose to KFG away to other units as well. If I have Steel Legion Chimera out that means any unit with 1 attack now does zero. That’s super annoying. Two copies of Steel Legion Chimera means attacks of 2 are zero. Jeez. I know it’s a big cost investment at 4, but it’s pretty boss, especially if you have a Land Raider protecting them from Archon’s Terror. I never saw a Kustomisation Station but I’m sure i’s a similar effect to the Mork’s. Scary stuff. I think in the current meta the Hostile Acquisition is pretty much just a one shield card, which initially made me worry about Gorzod, as Nazdreg’s Bigga is Betta is incredible, and so is Zogwort’s Launch Da Snots. The Wagons though are a great value 2 drop and KFG fodder too! The discount on Valkyries, Hellhounds, Chimeras and Land Raider made up for the lack of combat tricks. Gorzod seems like a fun warlord that will only get better as more vehicles come out, and I’m sure there’s lots to improve on with this list. Carry on my wayward Nobs!