The Tactical Squad

Author: Lizrrdbreath

The Hammer Dance

If there is one thing about Warhammer 40,000: Conquest that new players miss, it is the importance of the Command Struggle.  Sure, you can try to dump all your units at planet 1 each turn and hope to win by brute force, but after a turn or so you’ll look across the table and say “Hey, why do I only have 4 resources and 2 cards while my opponent has 10 resources and 7 cards?”.  The reason?  The Command Struggle. The Command Struggle is the most subtle part of Conquest, but if you ask me, it is easily the most important part of it.  Even if the first three planets share an icon and your opponent won the first two, with more resources and cards at your disposal you can pick and choose your battles and overwhelm your opponent where necessary.  The Command Struggle requires many small choices to maximize your returns and minimize your losses.  So the question is, how do you maximize your gains from the Command Struggle, while not letting your opponent win the game by planet icons?  As you all know, whichever player has more command icons on their units at a planet after Warlords have committed will receive the card and resource bonus from a planet.  Leaving Warlords out of it for now, let’s discuss the basics.

Units

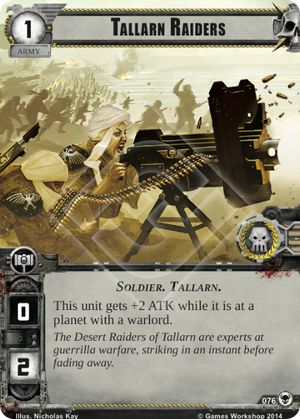
What is a command unit?  I would classify a unit as a command unit if it costs between one and two resources and has at least as many command icons as its cost.  Units like the one cost two command icon Biel-Tan Guardians and the two cost two command icon Iron Guard Recruits are good examples of command units.  What is a combat unit? A combat unit is a unit that costs three or more which has some decent attack and hit point stats or abilities intended for combat.  In general, you do not want to play out a combat unit for command.  Why pay three for the same number of command icons you can get for one resource, right?  There are situations where it is useful to play a combat unit out for command, which we will discuss later. What is a versatile unit?  There are other units such as the one cost one command Tallarn Raiders or Vior’la Marksman which can help out in a battle, but also are cheap and can be played at a planet to win command.  Still more examples would be more expensive units that have a way to move into combat during the combat phase, such as mobile units, Wildrider Squadron, or Boss Zugnog.  Having some of these more versatile units can help you strike the balance between command and combat.

Tips and Strategies for Command

Spread out your command icons. While it is tempting to deploy a Leman Russ Battle Tank with its whopping four command icons to planet five to lock down command there for most of the game, it is terribly inefficient to play a five cost unit for command that is meant for battle.  You could spend those five resources on three to five different units and spread your icons across the planets, making it much more likely to win multiple command struggles. Stall as much as you can before deploying units.  The longer you can wait until you start deploying your units, the less information your opponent has when they have to deploy theirs.  If you can play out some supports or take other actions that use up your deploy turns first, you are both gathering more information for yourself and denying it to your opponent.  Save two command icon units for later in the deploy phase. This point is related to the point above.  While it is tempting to play out your Void Pirate in your first deploy turn, your opponent could then play a two-command icon unit out at that same planet, surpassing your command at that planet.  If you can wait until your opponent has played a one command icon unit out to a planet, you can then play out your two command icon unit to surpass it.  Play units that have resource or card bonuses out to less desirable planets.  As a general rule, I like to play my Void Pirate and Rogue Trader out to Iridial and Y’varn, the planets that have a single resource or card bonus.  Your opponent will be less likely to fight you for command at these planets because in doing so he will get a smaller bonus than he would at a planet with some combination of two command rewards.  Try to win command on planets that reward you with what you are missing.  If you have a lot of resources and not many cards, then focus your command units on planets that give card bonuses, and vice versa. Take a look at the big picture of the planet layout.  If you look at the planets you may notice a balance between cards and resources.  At times you will look at notice that there is a very large surplus of one type, it can be as extreme as seven resources and only two cards.  If this is the case, then evaluate your current holdings of cards and resources and decide whether you should focus on these rarer rewards. If possible, try to choke your opponent.  While there are times where you may be frustrated and want to take me literally, I am not condoning violence against your opponent!  Choking your opponent involves winning command in such a way that you stop them from gaining something they are short on already.  If your opponent has one card and eleven resources, try to win planets that have card bonuses.  If you cannot do that, then tie command on those planets.  As long as your opponent is not getting the cards or resources that they need, the choke is effective.

Cards to be Careful of

There are a few cards that can really put a wrench in your command game so I wanted to list them below so you know what to watch for. [whc]Archon’s Palace[/whc]  This card can only be played by a Dark Eldar opponent.  It allows your opponent to turn off the card or resource bonus of a planet that you win command on.  If you are playing against Dark Eldar, I would focus on the planets that give one card and one resource first before the planets with two of a single reward.  When you win command on a one and one planet your opponent can only shut down half of your reward.  Also, avoid playing a Rogue Trader to a planet which rewards two resources, as they can shut down all three.  Try to play your Void Pirates and Rogue Traders so they are at planets which give them the opposite reward that they provide. [whc]Sowing Chaos[/whc]  This card can be played by Chaos, Dark Eldar or Orks.  This card destroys all units that cost two or less at blue planets.  Sowing Chaos is a game changer if you are not careful.  If you see your opponent is playing Chaos or allied with Chaos, be careful of sending your command units to blue planets.  If there are non-blue planets in play, focus command on them.  If you notice that your opponent has lots of units that are vulnerable to Sowing Chaos in play, it is less likely that they will play it because it would hurt their board state as well. [whc]Rotten Plaguebearers[/whc]  This card can be played by Chaos, Dark Eldar or Orks, notice a pattern here?  It is a two cost unit with a command icon that has an ability which allows it to exhaust to do one damage to a unit at the same planet.  If you put out a command unit with low hps opposite this guy, your opponent can use his action to try to kill your unit, causing you to use shields to keep it alive. [whc]Atrox Prime[/whc]  This is a planet whose battle ability deals one damage to all enemy units at an adjacent planet.  If the command unit you want to play has only one hp, be mindful when deploying it at a planet adjacent to Atrox Prime.  If your opponent triggers a battle at Atrox Prime, or a battle at Carnath and triggers Atrox Prime’s ability, you can lose your unit.

Warlord Commitment

Your warlord has a super saiyan giant hammer that trumps the command of all enemy units at the planet he or she is committed to, save for the enemy warlord.  Committing your warlord to a planet requires many considerations, but I would like to touch on a few command-specific decisions.  Don’t send your warlord to a planet that you’re winning command on.  Let us say that you’re winning command on two planets and your opponent is winning on the other three.  In general, sending your warlord to one of the planets you are already winning on is a suboptimal play.  You were already going to get the command rewards from that planet.  Sending him to a planet that your opponent is winning command on not only denies your opponent those rewards, but also grants them to you.  There are exceptions to this general rule of course, such as if you are trying to choke your opponent, or know that they want to exercise the battle ability of that planet, in which case you may choose to send your warlord to that planet to block your opponent. If you plan to send your warlord to a planet, don’t bother deploying enough units there to win command.  If you see a planet whose battle ability you want to win or where you want to drop off all the units in your HQ, you are likely going to send your Warlord there.  If your opponent has a Void Pirate sitting at it, rather than deploying a two command unit out to win command there, put that unit somewhere else.  Your warlord is going to trump the Void Pirate anyways, so those resources are better spent elsewhere. Don’t always follow the two above rules.  This may sound strange, but you see these two rules above?  Don’t follow them 100% of the time.  If you do your commitments will be more predictable and your opponent will be able to decide where you are most likely to go and potentially stop you there.  They are both ways to ensure that you get more out of your command struggle, no doubt, but sometimes you need to make suboptimal commitments just to keep your opponent guessing. Thanks for reading, I’ll see you in the next article! John “Wigg” Gobeil John “Wigg” Gobeil is a veteran Conquest LCG player based out of Toronto, Canada. He contributes to the community as a tournament organizer for events in his area, a moderator for the Conquest LCG Facebook community, and a regular guest on a number of podcasts and other Conquest LCG media. Notably he is considered to be the scourge of many Toronto players who curse his regular high tournament placings and soul crushing. The Tactical Squad curses you John.

Revisiting The Threat Beyond

Revisiting The Threat Beyond

Its been a while now since the Warlord cycle ended and, while it has taken me a bit longer than intended, there is still a lot to be gained from going back to take another look at those War Packs. I think that, for the Tactical Squad, The Threat Beyond may have been one of the most anticipated War Packs at the time it was originally released. Astra Militarum had mostly been floundering since the Core Set and the pack seemed to include great cards for many factions. With the Warlord cycle in full swing, I think the impact was taken very much in stride. Looking back now this may have been the biggest release of the cycle. But enough build up; let’s talk cards.

Astra Militarum

I don’t think anyone anticipated this War Pack more than fans of the Astra Militarum. Colonel Straken was largely a let down and Torquemada Coteaz was an opportunity to start fresh.

089-torquemada-coteaz

Coteaz himself is a very unique and powerful warlord.  The combination of his stats and ability proved to be one of the most efficient setups of any warlords we’ve seen so far. Starting with eight cards and eight resources opens up the possibility of much more powerful and efficient first turn plays. One card and one resource may not seem like much but it really does make a world of difference and makes him the go to for AM combo heavy decks. Even with all the upsides Coteaz suffers from a base ATK of 0 and the need sacrifice unit to be able to contribute to a fight. Attacking for 3 is very powerful and provides tremendous assassination potential. Requiring a unit to sacrifice to have an ATK of 3 means that this warlord will be left high and dry if he doesn’t have support and that his staying power is minimal. Support comes in many forms for the inquisitor. His signature army, Coteaz’s Henchmen, is the exactly the support needed. Though the unit lacks hitting power they have a great combo power. If, in a turn, Coteaz and a henchman or two are the target of a Preemptive Barrage you will be able to make four to five ranged attacks from the units affected. Because of this, a single henchman at a planet can make an opponent very cautious.

092-the-glovodan-eagle

As you can imagine a Coteaz deck will require that a lot of units be sacrificed over the course of a game. The Emperor Protects means that units that are sacrificed can still factor in to the longer term. Beyond this use the card is only a single shield, making it harder to make use of often. Next up, the signature squad includes one of the most interesting signature attachments in the game. The Glovodan Eagle is a suprisingly versatile piece of gear. For the first couple of weeks after release one local Toronto player managed to repeatedly surprise just about everyone with some of the combos she achieved. Finally, we round things out with the signature support, Formosan Black Ship. A great utility for an even greater value, this support giving the signature squad the staying power needed to swing the tide of a battle. All told, Torquemada Coteaz and his signature squad are one of the most powerful in the game. Unfortunately the inquisitor is also one of the most difficult warlords in the game to use.

Space Marines

094-firedrake-terminators

The Threat Beyond isn’t a particularly important War Pack for Space Marines but it did bring three very interesting new options to the table. Possibly the best option provided is the Firedrake Terminators. This Elite unit may be one of the best in the game, having good command and ATK, decent HP, and an excellent ability. As Elite units are given more support the Firedrakes’ stock will only grow, especially if swarm continues to be prominent in the meta. Marines also get two other decent cards, the Imperial Fists Siege Force and the Nocturne-Ultima Storm Bolter. Both of these cards have interesting abilities but may have limited use at this point. The storm bolter is too expensive for what it offers, though a 2-shield card that can be tutored via Earth Caste Technician is still useful. The siege force on the other hand is a good value but has limited scope. As the game sees more Ally cards released the siege force will improve in value and the Planetfall cycle seems like it will provide the opportunity. (Editor’s Note: There have already been 3 new Ally units introduced in the first 2 packs of Planetfall)

Orks

097-snakebite-thug

This War Pack was a big release for Orks, and by extension AM and Chaos, because of the two very powerful common units provided. The first of the units, the Snakebite Thug is another in the series of efficiently costed units with a drawback. Fortunately for the git the draw back is a minor one at worst and in some cases can even be a boon. Combo the fact that this unit is a Warrior and that it can be used with Staging Ground the utility is too much to ignore. The second unit, the Evil Sunz Warbiker, is the Ork faction “Warlord Groupie”. As one of the 2 cost groupies it is a great value, especially due to the combo potential with Staging Grounds. Finally Orks also get the unique support Mork’s Great Heap. Because this support is so expensive and you can only have one in play at a time it can be a difficult include. Though it does seem that many Ork players do find a single copy to be a worthwhile include for its occasional appearance.

Chaos

100-noise-marine-zealots

Chaos get the veggies of this War Pack. The cards included aren’t flashy or exciting but generally they are good to have available. The Noise Marine Zealots perhaps exemplify this the most. The Zealots help fill in the 3 cost slot in the faction’s curve, something Chaos needed more than many people realized. And in Zarathur they are a prime target for Infernal Gateway, raising a threat that players need to be constantly conscious of. The other cards given to Chaos have a lot of potential for growth. Turbulent Rift has a great ability but suffers from the need to use Elites. As support for the trait expands though the value of this card will increase. Cacophonic Choir on the other hand has good utility in the swarm heavy meta but doesn’t quite seem to fit in any of the warlords released to date.

Dark Eldar

For once in the Warlord cycle Dark Eldar get almost nothing in the War Pack. Kabalite Halfborn, Slake the Thirst, and Shadow Field are all decent cards with some possible uses but to date have limited reason to go in a deck.

Eldar

107-seers-exodus

For Eldar utility is the name of the game in The Threat Beyond. Mighty Wraithknight is a very powerful combat unit with an interesting ability. The exhaustion does hit your own units but if played correctly it can be easy to work around. Maybe you opponent has a lot of Ranged or the majority of your combat forces are in HQ, this effect will help balance that battle. Next Seer’s Exodus, an unassuming card, brings a new powerful trick to the table. I think a couple copies of this card is a great choice to include in any decks using Eldar cards. Seer’s Exodus provids a way to get out of bad situations you wouldn’t otherwise be able to. An excellent counter to Aun’shi and other assassination warlords, it leats you play riskier than you normally would be able to. Finally the children of Isha get Slumbering Gardens. Right now this card has next to no use. Maybe in the future we will see a reason to play it.

Tau

110-ksimyen-orbital-city

Closing out the War Pack as always are the Tau. First they get the Fire Warrior Grenadiers. This unit is ok for its cost but it lack of printed command hurts. If the Ethereal units available continue to expand, especially 2 or 3 cost options, this unit may become more popular, but until that time they will likely rarely see use. Finally the very last card in the War Pack is maybe the most talked about. Ksi’m’yen Orbital City is a super powerful card that really completes the Aun’shi deck. The Orbital City takes all the downsides of the Ethereal trait units and turns it into a great advantage.

Conclusion

As the first cycle of Conquest wrapped up this War Pack helped bring the game’s initial development to a close. I think it was The Threat Beyond that really helped cement many developing themes. This War Pack will be a staple for quite a while.

Episode 21 - I Hate You So Much Right Now!!!

In this episode of the Tactical Squad, Alex, Jon, Liz, and Travis reviews the contents of the latest Planetfall War Pack Boundless Hate, and bring a few spoilers from the upcoming Deadly Salvage.

This week’s episode is brought to you by Face to Face Games

https://tacsquad.provick.ca
https://www.patreon.com/tacticalsquad
https://twitter.com/tacsquad
https://www.facebook.com/tacsquad
thetacsquad@gmail.com

00:00
00:00
Download file | Play in new window | Duration: 2:13:42

Buying Guide - Tyranids

Buying Guide - Tyranids

When the Wahammer 40,000: Conquest Living Card Game was released in 2014 the core set included 7 playable factions. However, the rulebook stated that there would be a total of 9 playable factions. In 2015 the first of those two additional factions - the Tyranids - was released. In my first article, Buying Guide - The Basics, I talked about the structure of the Living Card Game format and game a general overview of some good starting purchases. In this article I’m going to talk about getting started with the Tyranid faction.

General

Someone who hasn’t seen much of the 40k universe in the past would might think of the movie Starship Troopers the first time they see the Tyranids. The comparison would be apt and one can imagine that Robert Heinlein’s original novel served as inspiration for Games Workshop back in the day.  The Tyranids are a swarm based faction that can combine a press of tiny bodies with the brute force of some enormous units. Mechanically, these space bugs focus on generating and buffing tokens, infesting planets to gain additional benefits, and start out with a unit that acts as a second pseudo-warlord.

whk08_product_shot

Starting out, Tyranids are actually one of the fastest and cheapest way to get into Conquest and be competitive. You can have almost everything you could ask for with just a single core set and the Great Devourer deluxe expansion. The expansion is chock full of Tyranid goodness, including two warlords - each with their signature squad, five synapse units, and a host of army units, events, attachments, and supports. The core set provides you with the rulebook, tokens, planets, and the neutral cards needed to supplement your deck. Because there aren’t many War Packs released to date that include Tyranid cards there isn’t much more to say beyond the recommendations I’ve already made. As more of the Planetfall cycle is released there will be a greater selection and thus more options to choose from.. We’ll revisit this recommendation towards the end of the cycle, so come back and take a look again in a few months.

Buying Guide - The Basics

Buying Guide - The Basics

The Warhammer 40,000: Conquest Living Card Game by Fantasy Flight Games was released at Gencon in 2014. Since its release the game has seen its card pool grow continuously and the community has developed along with it. While this is exciting, it means that the game may be more daunting and expensive to enter. This buying guide will introduce prospective players to the Living Card Game model, explain what comes in different products, and give suggestions about what products will give players a good selection to get started with.

The LCG Model

For players new to the Living Card Game model created by Fantasy Flight Games the selection of available product can be somewhat confusing. This is the model used for most of their card games, including Android: Netrunner, Lord of the Rings: The Card Game, A Game of Thrones, and more. Product is generally released as set packs of cards with no randomness involved. As a result players collect more like a board game with expansions than a Trading Card Game.  If you know what you are getting in a pack then there is no “chase” and no need for an expensive secondary market.

whk01_sample

The base card pool in the Warhammer 40,000: Conquest LCG is available in the Core Set. This box includes enough cards for two players to play a game, all the tokens and components you will need, a Learn to Play Guide, and a Rules Reference Guide. There is only one copy of most of the cards provided in the core set, with a small selection of cards that come with two copies. After owning a core set the most common way to expand your card pool are War Packs. These are packs of 60 cards, most often a warlord and the 8 accompanying cards of their signature squad along with three copies of 17 different cards. These are grouped in cycles of 6 packs that follow a number of shared mechanics or narrative themes, and release one pack at a time over the course of 6 to 8 month

51tgGaqZovL

s. Finally, players can also expand their collection with Deluxe Expansions. These are less frequent releases, usually only one or two a year, and include 155 cards along with inserts detailing any new rules and any additional tokens or components you may need for those rules and abilities. At this point it is hard to tell what will be in these but it seems that each will predominantly be cards for a single faction.

How Many Core Sets?

So now that you know how the LCG model works for the Conquest LCG you’re probably wondering what you need to get started. Well, this mostly depends on what kind of experience you are looking for. If you just want a fun game to play casually I would recommend just starting with a single core set. The selection of cards available offers really simple deck building and is enough to sit down and have an enjoyable board game experience with a friend. I would really suggest players start here is they are unsure about collecting the game. It is a great game, but you don’t need every expansion to have a great experience. For a player who is more certain that they want to play this game in a more dedicated manner, I would suggest starting with two core sets. The core set is  excellent to crack open and get started right away, but unfortunately it provides only basic deck building options. If you’ve played other card games then you will know that the more copies of a given card you have in your deck the more consistent your play experience will be. Unfortunately there is only a single copy of most cards in the box, meaning a second core set is required to get creative or begin to compete with players with larger collections. Finally, for someone who is interested in jumping right into competitive play, then 3 core sets is strongly recommended. A lot of the strongest cards in the game come in the core set and for complete deck building options a third box is needed.

After the Core Set

Now that you know how many core sets you are going to get, how can you expand your collection to start building new and interesting decks? Well that depends. Are you interested in playing a certain faction? Do you want a bit of everything? If you are looking for some variety I will give you a few suggestions below, but I would also encourage you to peruse the cards in each pack at ConquestDB or CardGameDB. If you’re interested in a specific faction I would suggest you check out my other articles for each specific faction as they become available on this site.

**_

40k_conquest_lcg_decree_of_ruin

Decree of Ruin_** (Planetfall cycle)

The first War Pack of the Planetfall cycle, this pack offers a number of new mechanics that add more interest to your game! It includes two versatile and interesting warlords to expand your options and great cards for almost every faction. This pack has the added bonus of a lore insert which is the first installment of a six part story narrating the events of the cycle. This pack is also the latest pack at the time of writing, so it offers the opportunity to enjoy the experience of following along as new packs are released.

_**

pic2337530

Zogworts Curse**_ (Warlord cycle)

This War Pack comes with the Ork warlord Old Zogwort, a strange but straight forward warlord. He is very fun and doesn’t require any cards in particular to work well. You also get three great common Astra Militarum cards that are great for use in Militarum, Space Marines, and Orks. Tau, Chaos, and Dark Eldar also get some staples for use in their respective factions. Review

 _**

pic2247619-1

The Scourge**_ (Warlord cycle)

The second War Pack of the Conquest LCG’s first cycle of expansions, The Scourge introduced a second Chaos warlord in the way of Ku’gath Plaguefather. This curious warlord opens a whole new playstyle, different anything else we have. Along with the powerful new warlord the War pack includes several key cards for Orks, along with some major options for Astra Militarum, Tau and Dark Eldar. Review

War Journal - There is Only Worr

War Journal - There is Only Worr

Rotation 5 - December 3rd to December 22nd

Its been another slow month in my gaming life this December. I only managed to get in 10 games of Warhammer 40,000: Conquest but included in that was the first tournament I’ve been to in a while. With the release of Decree of Ruin I made the decision to focus my limited gaming time on our new Astra Militarum warlord Broderick Worr. While Captain Cato Sicarius and ”Old One Eye” were also sleeved up to play this rotation, I didn’t manage to get enough games with either to warrant reviewing them. So on that note lets talk about our grizzled Militarum vet.

Worr

[table width=“250px”] Army (28)[attr colspan=“2”] 4x Anxious Infantry Platoon 3x Cadian Mortar Squad 2x Captain Markis 2x Enginseer Augur 3x Iron Guard Recruits 3x Ratling Deadeye 2x Rogue Trader 3x Sanctioned Psyker 1x Seraphim Superior Allegra 3x Tallarn Raiders 2x Void Pirate [/table]

[table width=“250px”] Support (3)[attr colspan=“2”] 2x Catachan Outpost 1x Forward Barracks [/table] [table width=“250px”] Attachment (3)[attr colspan=“2”] 1x Commissarial Bolt Pistol 2x Promotion [/table] [table width=“250px”] Event (16)[attr colspan=“2”] 3x Muster the Guard 2x Noble Deed 3x Preemptive Barrage 2x Summary Execution 3x Suppressive Fire 3x To Arms! [/table]

For the first time since I started writing these journals we’ve seen the release of brand new cards. I decided to start with Worr because my last two rotations each included one of the previous Astra Militarum warlords, Colonel Straken and Torquemada Coteaz. I thought Worr would be the next logical step and provide a good frame of reference for testing. Starting out I felt able to go in pretty much any direction with putting together a deck. There is not much established wisdom or particular innovations for Worr, leaving the field open to lots of ideas. Starting with his ability, which focuses on Astra Militarum units at stronghold (green) planets, I was determined to keep the army units mono faction with the exception of Rogue Trader and Void Pirate. I decided that this would be the perfect deck to run Muster the Guard out of. Worr’s ability works well regardless of what planet he is committed to, making it easier to keep him out of danger while he is exhausted. Additionally his other ability to destroy army units that retreat from the planet he is at means that though he won’t win command while exhausted he is still very effective at destroying opposing command units. Beyond the general decisions I started to look at the opportunities his signature squad and potential synergies. I decided to add Noble Deed for the extra utility from combat units that would otherwise be destroyed because they can’t retreat. I included Enginseer Augur to help dig for the signature support Forward Barracks and potentially deploy outposts for free. With the generally solid command in the rest of the deck and numerous buffs to the ability of the Enginseer (extra attack at green planets, more sacrifice or destroy effect than I would normally have, etc) I found it worked well in this deck where maybe it wasn’t a strong include in others. I added Captain Markis for similar reasons to Noble Deed and Cadian Mortar Squad for the synergies with the sacrifice effects along with their added value under Worr’s command. When I started to play games with the Commissar I found that many of my initial assumptions seemed to be correct. Even with only three stronghold (green) planets showing up in a game - the minimum number - he is still very capable. I was able to build tremendous collections of units for very effective combats and play a strong command game. The use of Muster the Guard and Broderick’s utility for the remainder of that turn generally followed the pattern I predicted. Despite all this I actually found it difficult to win games. Most games had a reasonably tight finish, or had a one sided result after several particularly close combats, but I only managed to win a quarter of my games. At this point I think this can be attributed more to myself as a player than the deck or Worr himself. I have had a much lower win percentage lately and made a reasonable number of costly play errors, particularly in the tournament. Moving forward I’m not sure where I would go with Broderick Worr. As the Planetfall cycle continues and we see more cards become available, a more defined play style may become evident, but until that point I think I will likely fiddle with something very similar to what I’ve already built. Next rotation I’ll be focussing on our other new combatant, Commander Starblaze. But, I also plan to build Zarathur, High Sorcerer and try to get in some more games with Old One Eye. Until next time!

[table width=“208px”] Worr[attr colspan=“2”] Loss v Coteaz (Planet 5) Win v Eldorath (Planet 7) Loss v Ragnar (Planet 7) Loss v Baharroth (Planet 5) Loss v Old One Eye(Planet 7) Loss v Straken (Planet 3) Loss v Cato (Planet 4) Win v Nazdreg (Assassination 6) [/table]

[table width=“208px”] Cato  [attr colspan=“2”] Loss v Worr (Planet 5) Loss v Eldorath (Planet 6) [/table]

Episode 18 - Showdown on Sacellum

SUNDAY SUNDAY SUNDAY!!! Commander Starblaze versus Broderick Worr in the battle of the century. Mark, Jon, and Alex talk about our latest warlords, open up some rapid fire topics, and share our first Planetfall cycle spoilers, the Ork cards from Boundless Hate.

https://tacsquad.provick.ca
https://www.patreon.com/tacticalsquad
https://twitter.com/tacsquad
https://www.facebook.com/tacsquad
thetacsquad@gmail.com

00:00
00:00
Download file | Play in new window | Duration: 1:13:21

Revisiting Zogwort's Curse

Revisiting Zogwort's Curse

Well, Worlds Weekend at the FFG Event Centre in Minnesota recently came and went and now that thing have began to calm down it seems I have time to get some more writing done. That means it’s time to continue revisiting the cards we were released during the Warlord cycle, this time looking at the cards contained in the fourth War Pack, Zogwort’s Curse. This pack saw strong tools for many of the factions, though overall it may have been underestimated.

Orks

067-old-zogwort

We open the pack with a new warlord, Old Zogwort.  At a cursory glance his ability to create Snotling tokens, and the Forced Reaction that destroys them all at the end of combat seem at odds, but with some intelligent play you can leverage his advantage in a drawn out fight.  This mean that Zogwort needs to stick around for multiple rounds of combat and because of this he can be very vulnerable to being bloodied and assassinated.

Next we have a contender for most underwhelming signature army, Zogwort’s Runtherders. This unit is very hard on the cost curve for any Zogwort deck and unfortunately doesn’t provide much. Its ability is an Interrupt meaning it will trigger even in response to a killing blow, but this unit still leaves something to be desired.

Zogwort’s signature support, Zogwort’s Hovel, is one of his best signature cards. This card serves to prevent opponents from focusing on attacking Zogwort with a number of smaller units for fear of not being able to deal with the many snotlings that may result. Since the game has moved in the direction of a swarm focused meta the stock of this card has only increased that much more as now Zogwort is less likely to face single high damage attacks. Unfortunately, as is the case with all signature supports, you can only have one copy of this card in your deck.

071-launch-da-snots

Wyrdboy Stikk unfortunately stands up about as well as Zogwort’s Runtherders. Having the three shield card is nice and the ability is flexible, but I’m not sure I want to find myself choosing the ability over the shield icons.  Moving on to the final card in Zogwort’s signature squad, Launch Da Snots, which, given its power, may be the best card in his signature squad. This event is a Reaction to a unit being declared as an attacker, meaning you can use it as a surprise when needed and not risk the unit in question being routed or destroyed by enemy card effects before having the opportunity to make its attack. It is also noteworthy that this event actually synergizes well with Zogwort’s Reaction since you can decide what order they happen in, allowing you to create a snotling with his ability and then add the extra attack with Launch Da Snots.

All told, I think Zogwort has a lot more potential than many first believed, but he definitely is still missing a few pieces. We didn’t see any direct support for Snotling tokens, but his deck still has a lot of potential to be competitive. If you are interested in hearing more of my thoughts on Old Zogwort then you can read about my experience playing with him in my War Journal - That’s a Lot of Tokens.

Space Marines

Space Marines continue to receive Space Wolves love with their first army unit in this War Pack, the Blood Claw Pack. This unit provides a potential economic advantage if played correctly in a Space Wolves heavy deck, but at this point in the game there are only a handful of army units that it can target and this card is probably not worth the economic advantage you will occasionally gain from the limited expensive targets.

073-rally-the-charge

Next is the event Rally the Charge, a very powerful card but one that relies too heavily on card combos or units that don’t often see play. I don’t know if this card is powerful enough to bring those less played units back into vogue, and I think I would suggest keeping it in the back of you brain as a potential power card for later in the LCG’s life.

Finally SM are given the support Secluded Apothecarion. Like most alternate economy cards, this support hasn’t seem much play at all. Looking at this card again, I think there is potential for a decent long term payoff in some decks but I’m not sure if what it brings is enough to really shift the established Space Marine play styles. Certainly as more and more low cost Space Marine units become available the stock of this support will increase, but until that his critical mas this will continue to sit in most people’s binders.

Astra Militarum

With each War Pack in the Warlord cycle, Astra Militarum seems to get more and more toys. This pack is no different and in fact adds also is a great help to the factions that can take AM allies.

076-tallarn-raiders

First we see Steel Legion Chimera, another tool added to the Militarum’s strong defense game. This army can be a tremendous benefit in certain game states, stacking with cards like Blood Angels Veterans, Bodyguard, and Rockcrete Bunker. The cost of the Chimera can be hard to pay sometimes, but if your cost curve predominantly sits around 2 cost and below then there is room in a deck for this card.

Tallarn Raiders come next in the War Pack. I think this army unit qualifies as the best warlord groupie that we see during the Warlord cycle. I say this often but it bears repeating, 1 cost for 1 command icon is a great value. In addition the Raiders have an effective combat presence. This makes them a staple include in any deck using AM faction cards.

Finally Astra Militarum get the support, Staging Ground. Another in a large collection of supports available to AM, this card gives a very surprising amount of flexibility. Combined with Ammo Depot or just a lot of cheap units on hand this card can provide a serious tipping point to most combats. A staging ground essentially allows you to ambush in a target unit. I’ve found this to be a very strong include for many decks.

Chaos

078-gleeful-plague-beast

Chaos receive one of their most important cards all cycle in this pack. At first I was very unimpressed with Gleeful Plague Beast. I didn’t see why you would take it over Vicious Bloodletter, but I began to see articles online singing its praises and the local Zarathur enthusiast started to get very excited by this new Elite Daemon. At this point its hard to envision a Chaos deck without the Plague Beast. While the army unit damages your own units in addition to your opponents, it does so at a point in the round that is very hard to prevent. This means that, short of Inquisitorial Fortress or judicious use of damage effects, your Plague Beast will have a large impact on the combat phase. Pair it with Zarathur, High Sorcerer and you will be doing 2 damage to all enemy units. With Ku’gath Plaguefather you are priming your warlord so that he is ready to use his ability. I definitely think the Gleeful Plague Beast is a strong include in most Chaos factions decks.

The other two cards that Chaos gets this pack are both fairly low impact. The first, Blight Grenades, is very slow and very easily countered. It is a high cost to use and has very few viable targets to attach to. The second, Doombolt, is an interesting but very limited card. It is another source of direct damage but can only be used during deployment. As a result it requires setup and planning to use effectively. Both of these cards could get better given some time and the release of new combo cards.  But unless and until that happens I don’t expect to see them much at all.

Dark Eldar

Next up the forsaken children of Isha receive even more great options to add to their arsenal. The first card is their warlord groupie, the Bloodied Reavers. Initially I though that the Reavers ranked as one of the less effective groupies, landing maybe in the middle of the pack, but they have actually proved to be one of the most used of the bunch. The limit of no wargear attachments is almost completely irrelevant in the factions that can play the Bloodied Reavers, and it fills in the two cost army slot in deck construction allowing for a smoother curve.

083-searing-brand

Dark Eldar also get a couple Torture traited cards in preparation for Urien Rakarth. Crucible of Malediction brings an added utility to the Torture cards in your deck. Unfortunately this card can be very very slow. Having a maximum of 7 opportunities to trigger over the course of a game. Even then only if you play it on turn one and the game plays out 7 rounds. It also requires you to have torture events you’re able to play in hand.

Moving on from a sub par card to the final Dark Eldar card in the War Pack we get Searing Brand. As a two shield T__orture event this card holds a key slot in any Urien deck. The ability can sometimes be difficult to trigger, but when you are able to make Searing Brand fire the effect is very worth while. When you aren’t able to use it for its effect, you will always be happy to use it for it’s two shields

Eldar

Unfortunately Eldar didn’t receive anything worth talking about. In my opinion neither Vectored Vyper Squad or Guardian Mesh Armor have a place in any existing or potential Eldar archetypes.

Tau

Unlike the Eldar, the Tau get a very substantial set of cards in Zogwort’s Curse. Opening with the Sa’cea XV88 Broadside, the Tau gain a powerful Elite army unit. Starting out with decent stats for its cost this army gets even better when it is equipped with an attachment. Some prime candidates include Gun Drones and Repulsor Impact Field, either bolstering its effect with stacked Area Effect or making it even more troublesome to remove. Like most Elites the Broadside is particularly weak to some removal effects, but I think the power of this unit outweighs that weakness.

088-heavy-marker-drone

Next Tau get a very interesting and versatile card, Tense Negotiations. At first this card was exciting for the prospect of being able to exhaust Aun’shi and have him able to remain at a planet for another combat round. The event has proved to be far more potent and versatile, being useful for any warlord able to take it. Baharroth particularly makes excellent use of Negotiations because of his ability to move around the board so much more freely. The cost of exhausting your warlord is definitely worth it in exchange for some of the battle abilities available.

The last card for both this War Pack and for Tau, but certainly not the least for either, is Heavy Marker Drone. Immediately we have a two shield icon attachment which is great news for the faction in general but Commander Shadowsun in particular. There is excellent synergy paired with Shadowsun, Aun’shi, or Ambush Platform. For me, at least, this may be the most exciting Tau card all cycle.

Conclusion

Because of the warlord in the War Pack I think a lot of people were unimpressed with this release. In hindsight this pack was very important for all of the cards it provided to Astra Militarum and Tau, with some key cards for Chaos and Dark Eldar as well. It may not be glamorous but Zogwort’s Curse definitely is a valuable War Pack.

War Journal - It Just Won't Die

War Journal - It Just Won't Die

Rotation 4 -November 3rd to December 2nd

Its that time again! War rages on amongst the stars and my quest for greater tactical prowess and combat experience continues. It has been a rough several weeks and unfortunately my opportunities to both play games and write have suffered from a busy schedule. As a result I spent longer focusing on the warlords I had built for this rotation. In this War Journal I’m going to focus on Ku’gath, Plaguefather and Colonel Straken. I had 13 games between the two. I also played a few games with “Old One Eye” but I’m going to continue to experiment with that deck so I’ll leave that write up for my next journal.

Ku’gath

[table width=“250px”] Army (25)[attr colspan=“2”] 3x Chaos Fanatics 3x Gleeful Plague Beast 3x Heretek Inventor 3x Khorne Berzerker 4x Kugath’s Nurglings 1x Roghrax Bloodhand 2x Rogue Trader 3x Splintered Path Acolyte 3x Sslyth Mercenary [/table] [table width=“250px”] Support (1)[attr colspan=“2”] 1x Vile Laboratory [/table]

[table width=“250px”] Attachment (7)[attr colspan=“2”] 3x Promotion 3x Slaanesh’s Temptation 1x The Plaguefather’s Banner [/table] [table width=“250px”] Event (17)[attr colspan=“2”] 3x Archon’s Terror 2x Cacophonic Choir 1x Exstatic Seizures 2x Fetid Haze 3x Promise of Glory 3x Tzeentch’s Firestorm 3x Warpstorm [/table]

After training for and playing in American Nationals this past Gencon I was tired of Eldorath and ready to move on to something new. One of the players I play with regularly, Victor, gave me his Ku’gath deck and challenged me to give it a go. I had mixed reviews of the Plaguefather up until that point but the tournament helped improve my opinion of him as a viable option. Playing with him this rotation, I decided to go with a very similar build, using Dark Eldar as allies. Because of my experience with him previously I only ended up playing four games with him this time around. Generally I found my playtesting reinforced what I had discovered before. Ku’gath is a powerful warlord that requires a certain type of finesse. Using a variety of powerful events along with a strong selection of command units, bolstered on both accounts by the Dark Eldar allies, there is a great amount of control to be had. That said, some of the units and effects can create very complex game states and, if you don’t have the resources at hand when you need them.it can be hard to push through. I’m still kind of working on finding my comfort zone with Ku’gath but I think his play style doesn’t quite click with me. I’ll continue experimenting with him occasionally but I feel that overall, while my opinion of him has improved substantially, I don’t enjoy playing as the Plaguefather myself.

Straken

[table width=“250px”] Army (27)[attr colspan=“2”] 3x 10th Company Scout 3x Blood Angels Veterans 2x Firedrake Terminators 2x Iron Guard Recruits 3x Ratling Deadeye 2x Steel Legion Chimera 4x Straken’s Command Squad 3x Tactical Squad Cardinis 3x Tallarn Raiders 2x White Scars Bikers [/table]

[table width=“250px”] Support (5)[attr colspan=“2”] 2x Catachan Outpost 1x Omega Zero Command 2x Rockcrete Bunker [/table] [table width=“250px”] Attachment (5)[attr colspan=“2”] 2x Bodyguard 2x Promotion 1x Straken’s Cunning [/table] [table width=“250px”] Event (13)[attr colspan=“2”] 3x Crushing Blow 2x Glorious Intervention 3x Suppressive Fire 2x Indomitable 3x To Arms! [/table]

Straken has gotten a lot of flak from the Conquest community since the game launched at Gencon last year. As a warlord he has been criticized for his card text essentially being a less version of the ability on Zarathur, High Sorcerer. Until lately I have agreed with all of this, but lately I’ve been starting to think more about the strength that comes from his signature squad. Looking at his signature event, Glorious Intervention, and his signature unit, Straken’s Command Squad, you can see a strong basis for an attrition style of play that isn’t really present in any other signature squad. Combine this with Rockcrete Bunker, Steel Legion Chimera, and the many double shield cards available in Astra Militarum and you’re beginning to build a strong defensive archetype. I decided to follow this direction and see how far I could take it. I decided the best course of action was to go heavy into Space Marines cards. This ally choice gives access to Firedrake Terminators, Blood Angels Veterans, and Indomitable to really flesh out a defense focused game. Playing this deck I was impressed to find that the strategy I was taking a shot at was not only effective but actually powerful and very flexible. When accompanied by Marines, not only is the defensive strategy shored up,but several very powerful offensive options become available. The deck has some novelty at this point because many players don’t expect cards like Indomitable or Crushing Blow to be played out of faction. I do have confidence in how the deck will develop over time though, even once a player knows what tricks are coming it can still be difficult to play around what is in store. I am really pleased with how this deck is working.  So far it has gone 6 and 3. Going forward I will continue to develop and practice with this list. There is a lot of potential for this style of Straken deck to be competitive and with the Unstoppable keyword being introduced and expanded during the Planetfall cycle there should be a number strong Space Marine cards to add, as well as any new options Astra Militarum gain in faction.  From just the first pack, I’m already  excited to test Righteous Initiate in the next version of the deck. I will continue to play Old One Eye, but I will be changing out Straken and Ku’gath for Broderick Worr and Captain Cato Sicarius. I hope to post my next War Journal before the holidays, so keep an eye on this space. Until then, thanks for reading and May the Emperor Protect!

[table width=“208px”] Ku’gath[attr colspan=“2”] Loss v Nazdreg (Concession 1) Loss v Nazdreg (Assassination 6) Win v Eldorath (Planet 5) Loss v Zarathur (Planet 7) [/table]

[table width=“208px”] Straken[attr colspan=“2”] Win v Aun’shi (Planet 4) Win v Nazdreg (Planet 6) Loss v Shadowsun (Planet 5) Win v Baharroth (Planet 4) Loss v Old One Eye (Planet 7) Win v Coteaz (Planet 6) Loss v Old One Eye (Planet ?) Win v Urien (Planet 4) Win v Urien (Assassination 6) [/table]

War Journal - Flap, Flap, Flop

War Journal - Flap, Flap, Flop

Quack… Quack… Quack… Quack. Quack. Quack. Qua- What..? Baharroth doesn’t play for the mighty ducks? Hmm… Well I suppose I should move along quickly then.

Rotation 3 - Oct 14th to Oct 29th

Well its been another few weeks and I’m done with two new warlords and moving on from another. I didn’t get nearly as many games in as I would have liked over the past two weeks and set my self back in my schedule a bit in an attempt to get a few extra games in. Thankfully, there’s nothing too pressing on the horizon, but unfortunately this rotation felt like a bit of a flop. All told I got in 11 games during this rotation, 5 with Baharroth,  3 with Torquemada Coteaz, and 4 more with “The Swarmlord”. How did I feel? Lets dive-bomb right into it.

Baharroth

[table width=“250px”] Army (29)[attr colspan=“2”] 1x Autarch Celachia 4x Baharroths Hawks 3x Biel-Tan Guardians 2x Bloodied Reavers 2x Incubus Warrior 2x Rogue Trader 2x Soaring Falcon 2x Spiritseer Erathal 2x Sslyth Mercenary 2x Vile Raider 2x Void Pirate 3x Warlock Destructor 2x Wildrider Squadron [/table]

[table width=“250px”] Attachment (1)[attr colspan=“2”] 1x The Shining Blade [/table] [table width=“250px”] Event (19)[attr colspan=“2”] 3x Archon’s Terror 2x Cry of the Wind 3x Death from Above 1x Foretell 3x Gift of Isha 3x Nullify 2x Seer’s Exodus 2x Subdual [/table] [table width=“250px”] Support (1)[attr colspan=“2”] 1x Banner of the Ashen Sky [/table]

When Baharroth was first released I panned him largely because of his signature army, Baharroth’s Hawks. Building his deck I found myself wishing that I was actually just using Eldorath Starbane. I decided to pair him with Dark Eldar to have access to Archon’s Terror along with a few other staple command and combat units. I also made the decision to include more Mobile units than I normally would to create a more distinct deck from what I usually play in Eldar. I didn’t get to play as many games as I would have liked but I was impressed with how Baharroth performed. Much like Old Zogwort, this warlord is very good despite his less than stellar nature signature army unit. His Hawks do manage to do work, but they suffer from more restricted deployment and greater fragility than other units. You are able to get a good discount on a number of excellent units with Death From Above. Deploying at the last planet is not a major draw back when you are getting two command icons for one resource and you are able to adjust your position with Mobile. Add to that Baharroth’s signature event, Cry of the Wind, and you can actually have units deployed using Death From Above arriving into combat much sooner than expected. This deck’s primary strength is its command game and ability to respond to threats. Having most Mobile units provide a reasonable combat presence and two command icons means you can spread out to win command and still converge on a planet for a battle. This kind of responsive presence allows the deck to dominate in multiple phases of the game. At this point I think the deck definitely needs more work.  The deck suffers when the you do not draw the right cards early. I have found that the cost curve is too high and relies too much on being able to cheat units in with Death From Above. The release of a few more good 3 cost Mobile units, or units with movement effects, for Eldar or either of its ally factions could really help make this deck style more effective. I believe that, with a couple more cards released that focus on this play style, Baharroth could become a very competitive warlord.

Coteaz

[table width=“250px”] Army (33)[attr colspan=“2”] 3x 10th Company Scout 3x Blood Angels Veterans 3x Cadian Mortar Squad 2x Captain Markis 4x Coteaz’s Henchmen 3x Iron Guard Recruits 2x Leman Russ Battle Tank 3x Ratling Deadeye 2x Rogue Trader 1x Seraphim Superior Allegra 2x Tactical Squad Cardinis 3x Tallarn Raiders 2x Void Pirate [/table]

[table width=“250px”] Attachment (1)[attr colspan=“2”] 1x The Glovodan Eagle [/table] [table width=“250px”] Event (11)[attr colspan=“2”] 3x Preemptive Barrage 3x Suppressive Fire 2x The Emperor Protects 3x To Arms! [/table] [table width=“250px”] Support (5)[attr colspan=“2”] 2x Catachan Outpost 1x Formosan Black Ship 2x Staging Ground [/table]

This rotation I played Torquemada Coteaz the least.  Fortunately, I have had some experience with him in the past. Usually I’ve built his decks with Orks as his allies but I decided to explore Space Marines instead this time around. Marines provide a degree of staying power not found in cheap Ork allies. After playing a few games using Space Marines as allies I think that it makes most sense to use Orks for the greater number of cheap units. The resilience of units like Blood Angels Veterans doesn’t seem to add up to the long term attrition provided by many cheap units, at least in this deck. Using Coteaz in many ways feels similar to playing Aun’shi. Because he has an ATK of O unless you use his Action to sacrifice a unit he can find himself easily outmatched if you aren’t consciously planning your combats. Though, if you are able to leverage the advantage when you have it, Coteaz can put an unprecedented amount of pressure on an opposing warlord. In my opinion he is the premier assassination warlord. Playing this deck has reinforced my belief on how lacking Astra Militarum can feel as a faction. At this point there is something, missing but I’m not sure what it is. Regardless, there is a lot of space for exploration and growth. [I asked Brad to make some more cards to help Coteaz — Travis]

Swarmlord

[table width=“250px”] Synapse (1)[attr colspan=“2”] 1x Stalking Lictor [/table] [table width=“250px”] Army (29)[attr colspan=“2”] 4x Brood Warriors 2x Hunting Gargoyle 2x Ravenous Haruspex 3x Ripper Swarm 3x Scything Hormagaunts 2x Shrieking Harpy 3x Strangler Brood 3x Termagant Sentry 3x Toxic Venomthrope 2x Tyranid Warrior 2x Volatile Pyrovore [/table]

[table width=“250px”] Attachment (3)[attr colspan=“2”] 1x Bone Sabres 2x Promotion [/table] [table width=“250px”] Event (15)[attr colspan=“2”] 2x Clogged with Corpses 2x Consumption 2x Dark Cunning 2x Indescribable Horror 2x No Mercy 2x Spawn Termagants 3x Spore Burst [/table] [table width=“250px”] Support (3)[attr colspan=“2”] 1x Leviathan Hive Ship 2x Spore Chimney [/table]

For purposes of this reflection I am going to talk about the whole month of playing with “The Swarmlord”. Starting out Tyranids required a lot of learning and assessment. Unboxing them, it was evident that there is a lot of potential for both Swarlord and “Old One Eye to be fairly competitive. Playing Swarmlord I still feel that this possibility is present, but it has become apparent that it will take some work to unlock the faction’s full potential. In many ways the Faction still feels very similar to playing the core set factions in the early days of the game. For this deck in particular I wanted to focus on playing a very limited amount of Hivemind, basically only including what I felt is necessary. Instead I built a focus on command and efficiency, relying on units that I thought could synergize well with a press of small bodies. Generally this strategy seemed to be successful, allowing me to play a long game with continuous pressure. I also decided to put a bit of emphasis on infestation. So far this feels like an under-developed mechanic. I don’t feel there are enough options to trigger infestation available yet, but when you can get it on the table it does feel like there are enough effects that benefit from it to be worth while. I discussed with a friend the use of Spore Chimney versus Virulent Spore Sacs. I had been opting for Chimneys but in this deck they may be too slow for the benefit they provide. Spore Sacs might be a more effective include but ultimately I would like a more consistent option than the one time use it provides. This may be something to develop further after more Tyrnaid cards are released. I really enjoyed playing Swarmlord, it’s ability allows it to indirectly influence battles and focus more on command. I look forward to revisiting and further developing this play style and seeing how Swarmlord and Tyranids in general fair at Worlds.   For the next rotation I will be building Ku’gath, Plaguefather, Colonel Straken, and “Old One Eye’. This will likely be the last set I play before the new warlords from the Planetfall cycle start releasing and I get to start incorporating the new card into decks and my game play.  

[table width=“208px”] Baharroth[attr colspan=“2”] Win v Ku’gath (Assassination 4) Win v Old One Eye (Planet 5) Loss v Shadowsun (Planet 5) Win v Old One Eye (Planet 5) Loss v Kith (Planet 5) [/table]

[table width=“208px”] Coteaz[attr colspan=“2”] Win v Swarmlord (Assassination 4) Loss v Ku’gath (Planet 5) Loss v Kith (Planet 5) [/table]

[table width=“208px”] Swarmlord[attr colspan=“2”] Loss v Eldorath (Planet 3) Win v Aun’shi (Planet 5) Loss v Ku’gath (Planet 3) Win v Old One Eye (Planet 4) Loss v Ku’gath (Planet 3) Loss v Coteaz (Planet 5) Loss v Zogwort (Assassination 5) [/table]